Friday, November 19, 2010

Choosing Wire for Jewelry Part 2

It's been awhile since I posted Choosing Wire for Jewelry Part 1, where I talked about solid wire.  This post is Choosing Wire for Jewelry Part 2 and is about craft wire.  In the future I'll write Choosing Wire for Jewelry Part 3, which will be about flexible beading wire.

  • Solid wire refers to gold, silver, copper, and brass wire.
  • Craft wire can be copper, brass, aluminum, and colored copper wire.
  • Flexible beading wire, such as Tiger Tail, Beadalon, Soft Flex and others are most often used for bead stringing.

 CRAFT WIRE:  is a type of solid wire which is used for wire-wrapping, jump rings, and coiled wire beads.  It's usually made from a base of copper or aluminum with a colored coating.  The coatings can be silvertone, goldtone, or a variety of other colors.  The coating on most of those wires is a bit more delicate than the plating on gold-plate or silver-plate wire.  Hammering and handling with pliers must be done carefully so that the coating isn't damaged.  The thickness of craft wire is measured by gauge, the same as solid wire. 
  
Typically craft wire does not come in different tempers.  It's usually somewhere between dead-soft and half-hard, but closer to dead-soft.  Of course, the larger the gauge (the smaller the number), the more difficult it becomes to work with the wire because of its thickness.  Craft wire will work harden with bending and hammering.  Be cautious, because too much bending will harden the wire to the point that it becomes brittle and it will break. 
  
A week ago I would have said that craft wire only comes in a round shape, but in this month's beading magazines I've been seeing advertisements for wire that comes in other shapes.  It's a bit hard to research all the wires available because some manufacturers only sell large-quantity wholesale and require registration to access their websites (which I didn't bother with because I can't buy those big quantities).  Here is some manufacturer-based information that I was able to find.  I'm sure that there are other manufacturers of colored craft wire.  These are the ones that I'm most familiar with:
  • Beadalon is known for the manufacture of Artistic wire, which is round, copper wire, colored with an enamel coating.  It is dead-soft and comes in 55 colors and 13 different gauges.                                                       http://www.beadalon.com/artisticwire.asp
  • Beadalon has a "German-style" silvertone wire, made from copper and brass with an anti-tarnish coating.  This wire comes in four gages, "medium" temper (half-hard), and five shapes.  They categorize this wire for wire-wrapping.  http://www.beadalon.com/germanstyleplatedwire.asp
  • Beadalon makes a stainless-steel wire for wire-wrapping that is about half-way between half-hard and full-hard.  It comes in round, half-round, and square.  It's available in 20 through 26 gauge sizes, depending upon the shape.  It is already more difficult to bend than half-hard wire and will work-harden more quickly than other wires.  http://www.beadalon.com/stainlesssteelwire.asp
  • BeadSmith manufactures round craft wire.  I found one website that sells 22 gauge in silvertone, goldtone, and copper, as well as 18 gauge in a variety of colors.  Because their website requires registration, I did not find out exactly what they have available.
  • BeadSmith is now advertising "pro quality...non-tarnish copper craft wire."  It comes in 18 and 21 gauge and comes in half-round and square shapes.  The four available colors are Silver-plated, Gold Color, Pure Copper, and Vintage Bronze Color. 
  • Darice is another manufacturer that makes colored wire, in a variety of colors and gauges, but only comes in a round shape.                        http://www.darice.com/ecom/Products.aspx?ct=CRAFT%20BASICS-CRAFT%20WIRE%20AND%20WIRE%20SHAPES-2013&oid=99
  • Parawire manufactures round, permanently-colored copper wire, with a non-tarnish coating.  They have a large selection of colors (I counted 36), which come in various gauges.  It appears that some colors come in 12 gauge through 32 gauge, while others come in limited gauges.                                              http://www.parawire.com/craftstore.html
  • Soft Flex Craft Wire is a new product.  It's another permanently-colored copper wire, which comes in 18 through 28 gauge, round, and 23 colors.  Not all colors come in all gauges.                                        http://www.softflexcompany.com/CategoryProductList.jsp?cat=Soft+Flex+Craft+Wire
If you know of any other reliable manufacturers of colored craft wire, let us know.

To see "Choosing Wire for Jewelry Part 1" click here.


© Copyright 2011 Linda's Art Barn. All rights reserved.
Wednesday, November 17, 2010

SLIDESHOW OF MY WORK

This slideshow is a collection of some of the jewelry I've made.  Included here are:  hand-knotted pearls and lapis lazuli necklaces; chain maille bracelet and earrings; beadwoven bracelets; and a variety of other pieces.

   
JUNE 1, 2012 UPDATE:

It has recently come to my attention that the website providing my slideshow has closed down.  Because of that my slideshow no longer exists. :(

I'm looking for another source for slideshows.  If I'm unable to create a new slide show, I'll be posting my work in still shots in the near future.


Sunday, September 12, 2010

September 11 Beaded Tribute


On Friday night, as I watched a 9/11 documentary, I finished my first square-stitch cuff bracelet, a design showing the Manhattan skyline with the Twin Towers still intact. 

I first saw the pattern, by a wonderful designer named Irene Landaw, in the June 2008 issue of Bead & Button magazine.  When I saw the Twin Towers in this pattern, I immediately knew that I had to make it--even though I had no idea at the time what the square stitch was.  Irene told me that she finished stitching her bracelet a month before the Towers came down.  The pattern was so popular that it will be included in a book that Bead & Button is publishing in 2011.  Irene has another pattern being published in the upcoming December/January issue of Beadworks.

In June of 2008 I had just begun to learn about bead weaving and all of the stitches seemed incredibly complicated to me.  Nevertheless, I was determined to learn how to make this bracelet, so I went to a bead shop and asked one of the clerks to help me choose the beads.  For whatever reason, she picked out iridescent beads for me.  If I had been a little more knowledgeable I might have held out for plain beads.  I'm so glad I didn't because I love the shimmering colors that I see in the bracelet now when the light hits it certain ways.

I put the beads and the pattern aside, waiting for a time when I knew how to do the illusive square stitch.  This past June my husband, the dog, and I went to our summer cottage for a long weekend and there was no room in the car for my usual trunk of beading or painting supplies.  But there was room for the Manhattan skyline bracelet supplies.

After two years of bead weaving, I was no longer so intimidated.  I went to the back of the magazine and tried out the generic square stitch instructions.  It was surprisingly easy!  I started the bracelet. 

Three months, about 25 hours of work, and almost 3000 beads later, I've completed the bracelet.  The first photo above is how the bracelet looks when the light is flat.  The second photo shows the shimmering pinks, purples, and blues that appear when the light hits it a certain way.

This bracelet is the most special piece of jewelry that I have ever made. 

God bless the souls who were lost on September 11, 2001 and the people who worked so hard to rescue them.

Saturday, August 21, 2010

Choosing Wire for Jewelry Part 1

Several things must be considered when choosing wire.
  • Solid wire refers to gold, silver, copper, and brass wire.
  • Craft wire can be copper, brass, and colored copper wire.
  • Flexible beading wire, such as Tiger Tail, Beadalon, Soft Flex and others are most often used for bead stringing. 
Today I'll be talking about the solid wires.

GAUGEis the thickness of the wire.  There are gauges of wire that are much thicker or thinner than traditional jewelry-wire gauges, but there's no reason to discuss them here, so I won't! 
  • The lower the gauge, the thicker the wire.  The higher the gauge, the thinner the wire.
  • The typical gauges for jewelry range from about 10 to 30 gauge.
  • 10 gauge wire is probably the thickest wire used for jewelry as it is very difficult to bend. 
  • The best gauges for rings are probably 10 through 16.  You want ring wires to be thick and stable.
  • Bracelets and necklaces are sometimes made from a base which is a single piece of fairly thick wire.  Other times they are made from smaller sections of wire, such as jump rings and shaped links.  Typically, necklace and bracelet wires will range from 16 to 20 gauge.
  • Earring wire is usually 18 through 22 gauge, with 21 gauge as the preferred gauge for ear wires.
  • 24 through 30 gauges are most often used in wire wrapping, wire knitting, and wire crocheting, where fine, flexible gauges are needed.
  • If you are stringing beads onto wire, you must use a gauge that will fit through the bead holes, which can vary considerably, with pearls usually having especially small holes. 
SHAPE:  Jewelry wire comes in four basic shapes.
  • Round wire is used for a variety of jewelry items.  Round is the traditional wire shape.
  • Half-Round wire is like a piece of round wire that has been sliced down the middle, leaving it to look like a half-moon when viewed from one of the ends.  It's good for wire wrapping because the flat side sits against the bead and doesn't slide around as easily as round wire will while you are wrapping it, but it appears like Round wire on the outside.
  • Square wire has four flat sides, which makes it good for wire wrapping because it sits against the bead without too much sliding around.  It can be very attractive because three squared edges are visible. 
  • Twisted wire is sometimes made from square wire.  Twisting turns square wire into textured round wire.  If you have a pin vise or a drill you can twist your own square wire.
TEMPER:  is the hardness of wire.  For me, this has been the most difficult thing to grasp about wire because there are so many variables that affect the hardness of a wire.  Hard wire can be softened by being annealed, which involves heating it.  Soft wire can be hardened by hammering, tumbling, or "work hardening."  I'll talk hammering and tumbling wire on another day.  Work-hardened wire is just what it sounds like...the wire gets harder as you work with it.  Have you ever bent a piece of wire back and forth until it broke?  That's because it will eventually become brittle and break if overworked.  As wire gets thicker, it will feel harder because thick wire is more difficult to bend.
  • Dead-soft wire is best for wire wrapping, wrapped loops, knitting, and crocheting because it is so flexible and does not work harden easily.  It is not good for something that must keep it's shape, like a ring. 
  • Half-hard wire is the temper that is used most often for jewelry.  It is relatively easy to bend, but hardens somewhat as you work with it.  Sometimes, work hardening isn't enough.  I'll talk about hammering and tumbling on another day.
  • Full-hard wire is not good for projects that require flexibility.  It is hard to bend and quickly becomes brittle, causing it to break easily.
  • Spring-hard wire is very difficult to bend.  When made into "memory wire" it springs back into its original shape after being bent--perhaps that's where it got its name.  It is also used to make pin backs and other items that need to maintain their shape.
When you purchase solid wire, including copper wire, from a bead shop, it should be labeled with its temper.  When you buy copper wire from a hardware store, it won't be labeled but will usually be half-hard.  Craft wire is soft and won't be labeled.

To see "Choosing Wire for Jewelry Part 2," click here.


© Copyright 2011 Linda's Art Barn. All rights reserved.

Saturday, August 14, 2010

Copper & Pewter

This is a follow-up to my blog from the other day, "Gold & Silver Prices." 

Copper:
A lot of us have started using copper for our wire and findings instead of gold-filled and sterling silver.  Copper is also a commodity and is subject to fluctuating prices, but it's not nearly as expensive as gold and silver.  The day that I posted the gold and silver prices, I saw that copper was a little under $4 a pound, which means that it's less than 25 cents per ounce.  That's a great price if you compare it to gold and silver.

Copper can be very nice on some pieces, but in my opinion, it doesn't work with all colors.  For example, I just don't like the idea of using copper with red, because it's like mixing orange and red.  You might like that look, but it bothers my eyes--probably goes back to the days of my youth when you weren't supposed to mix red, pink, and/or orange.  Of course, you can patina the copper so that it turns a dark brown if you like--I usually don't care for this patina very much because it's dull and looks like tarnish to me and I tend to prefer my metals shiny.  There are recipes for creating a verdigris (green) patina on your copper.  I love the color of verdigris, but it's a form of corrosion and it will flake off.  You might be able to protect it with some spray sealers, but I'm not sure.  I suspect that the sealers would quickly wear off, which makes this a bad choice for items to sell.

You can buy ready-made copper findings for reasonable prices in many local or online bead shops.  You can buy your copper wire in a hardware store--it's usually even cheaper there.  If you can find a hardware store that sells copper wire in various gauges without a plastic coating, you've hit the jackpot!  I understand that Home Depot used to sell small reels of 20 gauge, round copper wire, but I haven't been able to find it recently.  I have bought some copper wire by the foot in their electrical department, but they mostly don't seem to have the gauges that I want.  If you're doing wire-wrapping, you'll need to get your half-round or square wire from a bead shop.

Something to consider...Often the copper wire you buy in a bead shop is treated to resist tarnish.  The copper wire you buy in a hardware store is not treated.  I once made a necklace out of copper links from 2 different gauges of wire.  After a while the larger links (hardware store copper) turned a dull brown while the smaller links (bead shop copper) maintained their color and shine.  In this case, it doesn't bother me because I can occasionally soak the necklace in a vinegar/salt solution for a few minutes to remove the tarnish.  I know that the focal bead I used won't be harmed by the vinegar and salt because it's not porous. 

Lead-Free, Fine Pewter:
Another inexpensive alternative to sterling silver or gold-filled findings is lead-free pewter, also known as fine pewter.  It's made in gold-tone and silver-tone.  Fine pewter doesn't tarnish, which makes it superior to base metal findings.  While the silver-tone looks like sterling silver, the gold-tone can sometimes be a tiny bit brassy.  One downside to fine pewter is that it's brittle and cannot be "work hardened" so you'll only find ready-made findings.  You won't find wire, earwires, open jump rings, or clasps with moving parts made from fine pewter.  There are some wonderful fine pewter spacer beads, bead caps, cones, charms, and toggle clasps available.

For much of my jewelry, I use fine pewter toggle clasps and spacer beads with sterling or gold-filled jump rings and earwires.  Of course, I always list the types of metals I used in my items for sale in their descriptions.

Wednesday, August 11, 2010

Gold & Silver Prices

One winter, about 20 years ago, I hurt my back in a car accident and couldn't ski that year. While my friends were skiing, I wandered into a small bead shop and fell in love with beading. I started out with clasps, jump rings, chains, and headpins in goldtone and silvertone "base metals." I soon learned that those base metal findings didn't maintain their original color or shine for very long.

I continued to "practice" making jewelry with base metals for a while. After all, I was a beginner and I was the only one who was going to wear those pieces—and precious metals were much more expensive than base metals. For example, I think that base-metal headpins were about a penny each while sterling headpins were about 5 cents each back in those days. You might say that's not expensive, but it meant that sterling cost 5 times more than base metal. It really added up when I was making a necklace with lots of dangles or buying clasps and chains.  Once I developed skills, I moved up to sterling silver and 14K gold-filled findings.

Here is some information that some of you might not know about gold:

Gold—cannot rust or corrode. 24K gold is pure gold and is very soft. It must be alloyed with base metals to create 22K, 18K, 14K, and 10K gold to make it hard enough for jewelry. Alloys are also used to make colors, such as rose gold.

Gold Plate—a very thin layer of gold over base metals, such as zinc, nickel, and copper. It is relatively inexpensive, but the plating will wear off quickly.

Vermeil—like gold plating, but is a very thin layer of gold over a core of sterling silver. It is more durable than gold plate, but not as durable as gold filled.

Gold Filled— a layer of gold over brass or other base metal. The gold layer is 50 to 10,000 times thicker than the layer of gold on gold-plated jewelry. Therefore, it lasts much longer. The gold layer will eventually wear through, but could take many years.

Here is some information about silver:

Fine Silver—is 99.9% pure silver and is softer than sterling. It is too soft for clasps, but is good for wire-wrapping.

Sterling Silver—is an alloy using 92.5% silver plus other base metals.

Argentium Silver—is a modern alloy made with 93% silver and 7% germanium. It is similar to Sterling, but is a bit more expensive. Unlike Sterling, it is resistant to tarnish and firescale.

Silver Plate—is similar to gold plate. It is a thin layer of silver over base metals. The plating will wear off quickly.

All this brings me to the current prices of gold and silver, which have been rising quickly in the past few years. These precious metals are commodities, which makes them subject to fluctuating prices.

Average prices in 2000:
     - Silver was about $5 per ounce.
     - Gold was about $280 per ounce.

Closing prices on August 10, 2010:
     - Silver closed at $18.146 per ounce.
     - Gold closed at $1196.20 per ounce.

Of course, these prices are a huge problem for those of us who like to use precious metals in our jewelry creations. Many of us have VERY small businesses and cannot afford to buy in the quantities that most wholesalers require.  We are stuck paying retail for our findings, and then we have to pass the cost on to our customers.

Monday, July 12, 2010

Easy Way to Sand Polymer Clay After Baking

Most of us like the glow of a sanded, buffed polymer clay bead.  In addition to the sheen, it has a really nice satiny feel.  For those of us who have Fibromyalgia, MS, back and neck pain, pinched nerves, and other such conditions, the sanding process quickly turns into torture.  For those who are blessed with good health, sanding can be tedious and time-consuming.

A few months ago I happened upon a post at Polymer Clay Central by Eva (Mejsel) from Denmark, who made a battery-operated toothbrush into a sanding tool.  She's a genius!  Her website seems to be closed, but she's still a member at PCC.  Anyway, it was she who introduced me to this fabulous idea.  I've done a few things differently, but it's basically the same tool. 


Above are photos of my sanding toothbrush with a piece of 320 grit sandpaper attached to the spinner head with a piece of Velcro. 

Eva used a toothbrush with multiple heads, gluing a different grit to each head.  I used multiple Velcro dots to change the sandpaper on a single head.  For me, it's easier to keep track of the grits that way.

Here is how I made my sander.  I've written this information in minute detail, so there's no confusion.  It's actually very easy and only takes a few minutes to make.

MATERIALS:
  • 1 battery-operated toothbrush, the kind that uses replaceable AA batteries (a rechargeable toothbrush is good, too)
  • 1 package of Velcro "dots"
  • 1 Velcro strip, about 6 inches long
  • Glue gun and glue stick
  • A checkbook cover or an old Weekly Planner cover with side pockets (remove the pages)
  • Piece of cardstock to fit into one pocket, about 3X6 inches
  • Wet/dry sandpaper in multiple grits.  I used:  320, 400, 600, 800, 1200, 2000
  • Sharpie pen
  • Dish, bowl, or other container for water
  • Water
  • Dawn dish detergent
  • Paper towels
SOME THINGS TO KNOW:
  • The Velcro strip and dots will probably have glue on them already.  You might want to use hot glue to reinforce the glue that's already there, but it's probably not necessary.
  • Velcro is made up of hooks and loops.  The hook piece has tiny, hard, sharp, plastic hooks, which are scratchy against your skin.  The loop piece has soft, loopy fabric.  The hooks catch on the loops and that's what holds the Velcro pieces together.
  • The toothbrush head should have a circle of bristles that spin.  It may or may not have other bristles that don't move.  Ignore those stationary bristles.
  • You will go through far less sandpaper now, so when the sandpaper is worn or the glue stops working, just make a replacement.
STEPS:
  1. Turn on the toothbrush so that you can see which bristles spin.  Turn it off.  Using the glue gun, squeeze hot glue down into the circle of spinner bristles--this will hold the bristles upright and keep them from spreading while you sand.  Also put some hot glue on the top of the circle of bristles, as smoothly as possible--this will make a platform for gluing Velcro to the bristle head.  Be careful that you don't glue the circle of spinner bristles to any of the stationary bristles. 
  2. Stick a hook piece of a Velcro dot to the circle of bristles while the glue is still hot. 
  3. Cut a strip of Velcro, about 6 inches long, and glue the hook piece of the strip to the inside pocket of the checkbook or Weekly Planner cover (see photo below).  The glue on the back of the Velcro strip works fine on the plastic.
  4. Cut a piece of cardstock to fit into the pocket where you glued the Velcro strip and place the cardstock in the pocket.  Mine is 3X6 inches.
  5.  Using a Sharpie pen, write the grits on the cardstock above the Velcro strip.  Notice that the grits are in order, starting with 320 and ending with 2000 in the photo below.  Leave enough room for a Velcro dot to sit under each number.   I put extra unused Velcro dots in the other pocket.  In the photo below, you can see that the soft loop pieces are on the top row and the hook pieces are in the bottom row. 
  6. Cut a piece of sandpaper in 320 grit, using a Velcro dot as a guide. 
  7. Stick the 320 grit sandpaper to the glue side of the loop piece of a Velcro dot. If you use hot glue, be sure to apply a thin, smooth coat.  So far, I haven't bothered with the hot glue--the glue on the dot has been sufficient. 
  8. Press the 320 grit sandpaper/Velcro dot onto the Velcro strip, right under where you wrote 320. 
  9. Cut a piece of sandpaper in 400 grit, glue to a loop dot, and press under where you wrote 400 above the Velcro strip. 
  10. Repeat this for each grit of sandpaper until you have a sandpaper/Velcro loop dot for each grit.


NOTE:  Cut several extra circles of sandpaper for each grit.  Label a zipper snack bag with the grit number and store the extras in the zipper bags.  You should have a labeled bag for each grit.  Also, be sure to have an extra package of Velcro dots on hand--see the photo above.  Now you can quickly make replacements.

OK, you're ready to sand:
  1. Prepare a container of water with a couple of drops of Dawn dish detergent.  The Dawn helps the sanding process.
  2. Remove the 320 grit sandpaper/Velcro dot from the labeled strip and stick it to the Velcro hook dot on the spinner head of the brush.
  3. Dip the bead and the toothbrush head with the sandpaper into the water.
  4. Wear an old shirt or apron because the wet spinning brush will fling filmy water at you, although it washes right out.  I keep plastic behind my bowl, too, to protect the wall.  (You could hold the bead and brush under water the whole time you're sanding, but the glue will probably fail sooner if you do it that way.)  I'm right-handed, so I hold the toothbrush in my right hand.  I usually wear a long rubber glove on my left hand, which is holding the bead, to keep the water from running down my arm.
  5. Turn on the toothbrush and sand your bead thoroughly with the 320 grit.  Rinse the bead and the head of the toothbrush in the water frequently to remove the sanded clay from them.  Otherwise the sandpaper will clog up.
  6. Shut off the toothbrush.  Rinse the sandpaper, then dry it off with a paper towel.
  7. Gently peel the 320 grit sandpaper/Velcro dot off of the Velcro on the spinner head and stick it to its spot on the labeled strip.
  8. Remove the 400 grit sandpaper/Velcro dot from the labeled strip and stick it to the spinner head, dip in the water, and sand the bead.
  9. Continue to sand the bead with the rest of the grits of sandpaper, in ascending order by number.
At this point, your bead should be well sanded and ready for buffing.  For Cindy Lietz's excellent tutorial on how to use a Dremel tool to buff your beads to a shiny finish, go to Buffing with a Dremel Tool.

Cindy also has a free video that explains the sanding process if you've never done it before.  Sign up for Cindy's Weekly Newsletter and you have free access to the sanding video and two other videos.

WARNING:  Don't be tempted to sand dry beads with dry sandpaper.  First, it will make fine dust that you don't want to breathe in.  Second, the friction of the sandpaper on the bead will heat up the bead and could scorch or melt the spot that is being sanded.

ADDED ON 5/16/16
I recently learned that it's best to use a separate container of water for each grit if you want the best results.  That way, you have a clean container of water for each grit, which gives smoother results.

© Copyright 2011 Linda's Art Barn. All rights reserved.


Thursday, June 24, 2010

Jewelry and Polymer Clay

I've been making jewelry for many years, but I'm always learning something new. 

Years ago, I took a polymer clay class and learned how to cover a pen.  It was fun, but when I went home and baked my pen, the plastic inside melted and I couldn't get the ink cartridge back inside--and there was a nasty smell while it was baking.  I knew something went wrong, but I had no clue what.

Last year, I decided I wanted to make polymer clay beads to add some pizzaz to my jewelry and I began searching around the internet for information.  I learned some interesting things, but it wasn't until I found Cindy Lietz's Blog and Tutorials that I really began to learn about polymer clay--including why I burned that clay-covered pen and how to avoid doing it again.

Here are some photos of clay beads and jewelry made from clay beads that I've created since then from Cindy's tutorials.

The first photo is my very first clay bead.  It was actually supposed to be something totally different, a technique called Mokume Gane.  That failed, so I played with the clay and this pendant is what I ended up with.  Considering that it was born from a mistake, I was pretty pleased with it at the time, but I didn't have anything to hang it on.  I put it on a piece of ribbon, tied a bow at the back of my neck, and wore it out to dinner that night.  I thought I would have to make a beaded strand to hang it on, but shortly after that Cindy made a Cord Ends Tutorial, which showed me how to attach a clasp to my ribbon.   


The next thing that I learned from Cindy was how to make a Lentil Bead.  They're really fun to make and quite beautiful when they're finished.  The center of the bead has a swirl in it.  Here are a couple of my lentil beads.


Another thing that I learned from Cindy was how to form a Heart Bead.  Every time I wear either of these necklaces, strangers tell me how much they like them!


When I created the next bead, I was attempting to do something quite different, but again had a happy accident.  I was attempting to make an Extruder Flower Cane, but my extruder wasn't the brand that Cindy uses, and it wasn't cooperating.  I managed to get a short piece of flower cane, but mostly I ended up with ribbons of clay.  They were quite beautiful, so I made this Fantasy Bouquet bead, added crystal rhinestones to the top swirls, and put a pinback on it.


Here are a few more beads that I've created:  Torn Watercolor beads, which look like they were covered with torn pieces of paper; Faux Raku beads; and some beads that remind me a little bit of a peacock feather.


Oh, by the way, I am now capable of covering a pen with clay, baking it without burning, and getting the ink cartridge back inside!  What you see here are three objects that I covered with clay:  a stand to hold my pen, the pen itself, and my needle tool.


Tuesday, June 22, 2010

What's New in My Blog

I've been making some adjustments to my Blog over the past few days and thought I'd tell you what's new.

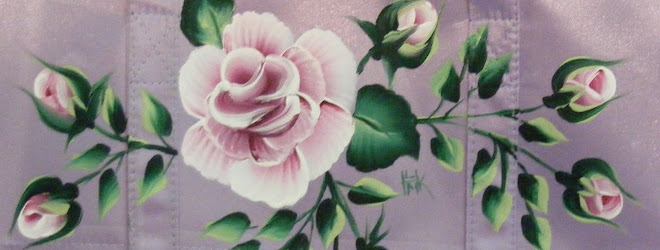
The most noticeable new thing is the photo of my painted roses at the top of the page.  I was teaching One-Stroke painting classes at Killington resort last summer and one of the students asked me to do my painting demonstration on her tote bag.  So I painted One-Stroke roses on her lavender-colored, satin tote bag.  I'm glad I photographed it before she took it away because it fits so nicely on the Blog. 

I've also added links that will take you to my Website and my two Photo Galleries.  The Photo Galleries need to be rearranged.  I hope to get to them soon...  :)

Finally, there is a link to my currently empty Etsy Store.  As soon as I am able to take some good photos and figure out how to calculate shipping prices, I'll be opening the Esty Store.  Of course I'll make an announcement on this Blog.

Saturday, June 19, 2010

Weekend with Auntie

Since this is my first blog, I should probably start by telling you that my name is Linda and I can remember wanting to be an artist as far back as my kindergarten days. 

Speaking of kindergarten, last weekend my 6-year-old grandniece, Paityn, came to visit.  Her sixth birthday present was to spend a weekend with me, painting and making beads from polymer clay in my studio. We had a wonderful time.  She painted some chipboard boxes with lots of color.  Then she made some interesting beads, which you can see here.


Paityn is very visually perceptive and she thinks like an artist, even at her young age.  Most of these beads are made from colors that she chose and marbled together herself.  She actually figured out that she could make the tube-shaped bead evenly shaped by rolling it with a flat piece of plexiglass.  Her most impressive bead is the gold and fuchsia "swirl" bead, also known as a "lentil" bead, at the bottom of the photo.  She wanted glitter on all of her beads, and unfortunately, the glitter makes it hard to see the pretty swirl she got in the center of her bead. 

I learned how to make Lentil Beads from Cindy Lietz's  (the Tutorial is here) and that is the technique that I taught my niece. 

While Paityn was busy making her beads I made three mushroom beads, which I learned from Cindy's Mushroom Bead Video.  Later I strung them into necklaces for Paityn and her two sisters.  I would have preferred to use my own colors, but after Paityn watched the video with me, she said she wanted the same colors that Cindy used.  It was her weekend, so her wish was my command.